I have been looking for a new laptop. My current one is a (HP) Compaq Presario, bought in 2003.
Still running strong on WinXP, I upgraded the Disk and RAM midway.
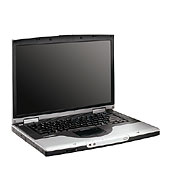
I can tell about this model - the exterior build quality was not good. But the computer was damn fine. So before you make arguments about Mac's build quality, note that exterior and interior are two different things. Mac's do have better exterior quality, all five of them. Interiors - they are all the same - if you know what you are buying.

The hottest new item in the Mac world is the Retina display, so I wanted to check it out. Crisp fonts and lovely, bright screen. I was sold.
But wait!
Crisp fonts yes, but Windows always have had crisp fonts. It's only Mac's fonts which need Retina. Don't give me the true-to-design argument. I don't want it to be fuzzy on my monitor. If Mac users have gotten used to it, good for them. I will not settle for less.
Retina is great, but a 1920x1080 on Windows will do just as fine.
Don't even get me started on Finder. Explorer beats it any day. Explorer is what is Simple and Intuitive. Mac's philosophy is 'Machine knows better than you'. In other words - users are dumb.
Mac (OS X) is "Intuitive". Really! Name ONE function which more "intuitive" in Mac than in Windows.
Windows beats Mac just on the software choices alone. For one $30 Mac package, there will be at least 10 Windows programs, 5 of them - free/open source.
Apple made great products in iPad and iPhone. Their hardware is nice, exterior build is top notch. But OS is a letdown. Preciesly why bootcamp was needed.
Update 12/24/2012
Ordered myself a MacBook Air.

It was a tough call between Retina and Air. In the end the $300, performance and weightlessness of the Air won me over.
Got mine for USD 1299 + 95 (3 Year Apple Care) + Free Parallels from BHPhotoVideo.com
Now, all my criticisms of Mac are still valid. Windows 8 however, is a disgrace to design. I have 'tried' many laptops over the last few weeks but none felt as solid as one from Apple. All you get are poor touchpads, ergonomics and confusing user experience (in contrast to Windows 7). One might get a 1080p display, though Windows doesn't scale it the way Apple scales it on Retina. What that means is that higher the resolution, smaller the text. My other complaint with PCs is the 16:9 aspect. A laptop is not a TV, for Christ's sake. A 16:10 such as that on Air still gives a more useful work-area on the screen.
Still running strong on WinXP, I upgraded the Disk and RAM midway.
I can tell about this model - the exterior build quality was not good. But the computer was damn fine. So before you make arguments about Mac's build quality, note that exterior and interior are two different things. Mac's do have better exterior quality, all five of them. Interiors - they are all the same - if you know what you are buying.
The hottest new item in the Mac world is the Retina display, so I wanted to check it out. Crisp fonts and lovely, bright screen. I was sold.
But wait!
Crisp fonts yes, but Windows always have had crisp fonts. It's only Mac's fonts which need Retina. Don't give me the true-to-design argument. I don't want it to be fuzzy on my monitor. If Mac users have gotten used to it, good for them. I will not settle for less.
Retina is great, but a 1920x1080 on Windows will do just as fine.
Don't even get me started on Finder. Explorer beats it any day. Explorer is what is Simple and Intuitive. Mac's philosophy is 'Machine knows better than you'. In other words - users are dumb.
Mac (OS X) is "Intuitive". Really! Name ONE function which more "intuitive" in Mac than in Windows.
Windows beats Mac just on the software choices alone. For one $30 Mac package, there will be at least 10 Windows programs, 5 of them - free/open source.
Apple made great products in iPad and iPhone. Their hardware is nice, exterior build is top notch. But OS is a letdown. Preciesly why bootcamp was needed.
Update 12/24/2012
Ordered myself a MacBook Air.
It was a tough call between Retina and Air. In the end the $300, performance and weightlessness of the Air won me over.
Got mine for USD 1299 + 95 (3 Year Apple Care) + Free Parallels from BHPhotoVideo.com
Now, all my criticisms of Mac are still valid. Windows 8 however, is a disgrace to design. I have 'tried' many laptops over the last few weeks but none felt as solid as one from Apple. All you get are poor touchpads, ergonomics and confusing user experience (in contrast to Windows 7). One might get a 1080p display, though Windows doesn't scale it the way Apple scales it on Retina. What that means is that higher the resolution, smaller the text. My other complaint with PCs is the 16:9 aspect. A laptop is not a TV, for Christ's sake. A 16:10 such as that on Air still gives a more useful work-area on the screen.
